|
Materials
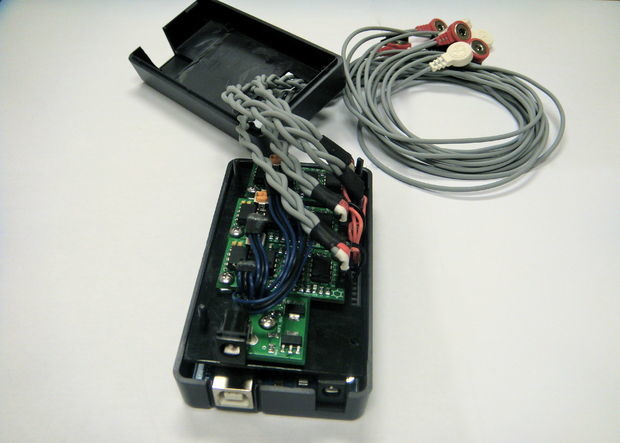
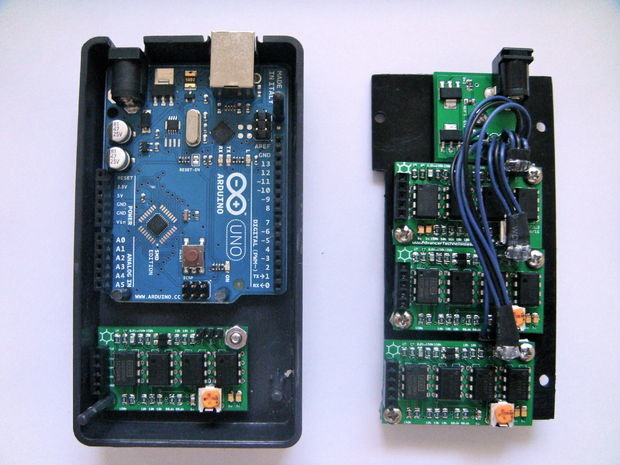
1 x Arduino Uno R2 (needs the atmega8u2 USB chip) •1X Arduino Project Enclosure •1XUSB cable for Arduino •4X Advancer Technologies muscle sensor •1X +/-5v power supply •1X 12v power supply board •1X muscle sensor electrodes •Jumper wires •3X 3 position female receptacle •1X 3 position female housing •3x Crimps for female housing •Plastic board(abs) |
|
Interfacing
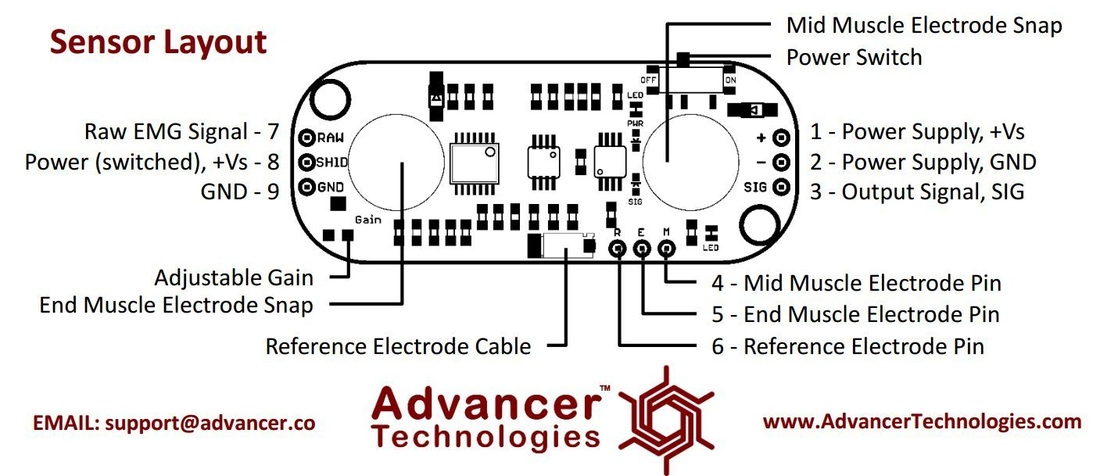
•Has a 12V power adapter which connects via barrel jack to the power supply board board and the onboard regulator reduces the voltage to 5V. • •The four muscle sensors which are mounted onto the case are provided power via the 3 pin output on the power supply board providing 3.5V to the sensor to the function. This connect to the Arduino by a 4 pin cable into the input/output lane for the Arduino. • •The sensor is connected to the electrodes which acquires data of muscle contraction and converts it to a digital signal interpreted by the Arduino and causes an action to occur within the desired program. • •The electrodes get hooked up to the muscle sensor, and each of the sensors need to be connected the reference pin on the Arduino. •Next we convert the Arduino into a HID(Human Interface Device) keyboard using Arduino sketech. •We use this to modify the threshold value so that the button sensitivity can be adjusted. •Lastly we upload new firmware onto the Arduino via the USB port. |
